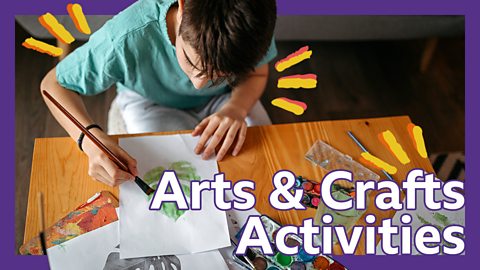
With Christmas fast approaching, why not get into the festive mood with some fun and easy crafts for the whole family?
Making Christmas tree decorations with your child is not only a super enjoyable way to spend time together, but will also leave you with a special memory that’s sure to grace your home each year.
Watch these three Christmas decoration tutorials and help them get into the festive spirit!

How to make a Christmas name chain
For a personalised Christmas decoration, follow these simple steps with your child so they can make their very own name chain…
How to make your very own Christmas tree name chain!
For this arts and crafts activity you will need the following equipment: Coloured card, safety scissors, PVA glue stick or tape, hole punch, pipe cleaners, string and a pencil.
First your circles onto coloured sheets of paper or card and then cut them out using a pair of safety scissors. You need as many circles as the letters of your name.
Next, using the hole punch, create holes at the top and bottom of each circle.
Then create a border around each of your circles using a pipe cleaner. You can glue them or stick them using tape.
Clip or bend your pipe cleaners to form the letters of your name and taped the centre of each circle.
Then to connect each circle, cut out pieces of string and loop them in between each letter of your name. Secure them using tape.
And there you have it, your very own name chain Christmas tree decoration. You can put it on your Christmas tree for some festive fun. We hope you enjoy this activity and have a very Merry Christmas.
To make a Christmas name chain, you'll need:
- Coloured card
- Pencil
- Safety scissors
- Hole puncher
- PVA glue/glue stick/tape
- String
- Pipe cleaners or coloured pens/pencils
Let’s get started
1. Draw circles onto pieces of card for each letter of your name
2. Cut out the circles using safety scissors
3. Hole punch the top and bottom ends of each circle
4. Cut pieces of tape
5. Tape a pipe cleaner around the edge of each circle to create a colourful frame (you could use ribbon or draw a pattern of your choice instead)
6. Cut or reshape another pipe cleaner for each letter of your name (alternatively you could draw the letters of your name using coloured pens, pencils or felt tip pens)
7. Tape or glue each pipe cleaner letter onto the centre each circle
8. Cut pieces of twine for each letter of your name (string or ribbons also work well)
9. Connect each letter of your name together by placing the string through the holes on each circle
10. Tie a knot in the the string to hold the chain together
11. Hang your name chain decoration onto your Christmas tree!
Colourful snowflakes
Does your family love the snowy season? Have a go at making snowflake decorations with your child! This craft uses paper straws or wooden sticks, which you either buy pre-coloured, or buy plain and paint them as a family – whichever is easier! Help your child follow these simple steps…
How to make your very own snowflake Christmas tree decorations.
For this arts and crafts activity you will need the following equipment: Tape, wooden sticks or paper straws, pompoms, string and glue.
For each snowflake you will need 4 sticks and 8 pompoms, let your child match the coloured sticks, straws and pompoms in their chosen style.
If you're using straws, cut two straws in half to create four mini straws and tape to create a star shape.
Then glue a pom pom to the centre of each of the snowflakes. If you're using wooden sticks, take 4 sticks and glue them to create a star shape and then glue pom poms around each edge of your snowflake.
Once your decorations are dry, cut out pieces of string and take them to the back of each snowflake to form a loop. And decorate your Christmas tree using your snowflake decorations. We hope you enjoyed this festive activity and have a very Merry Christmas.
To make some snowflake decorations, you'll need:
- PVA glue
- Tape
- Wooden sticks or coloured straws
- Pom poms
- String
Let’s get started
1. For each snowflake, you will need 4 sticks/2 straws and 8 pom poms
2. If you are using straws, cut them in half to get 4 mini straws
3. Cut pieces of tape
4. Tape the 4 straws or 4 sticks together to create a star shape
5. Glue a pom pom in the centre of each snowflake or to each corner of the snowflake
6. Cut pieces of tape
7. Cut pieces of string
8. Tape the string as a loop to the back of your snowflake
9. Hang your snowflakes onto your Christmas tree
Here's how to make an animal Christmas tree topper
Stars and angels are all well and good, but what if your child wants something a little more…wild? Help them make this super cool animal tree topper! There are so many animals to choose from, but in our tutorial we create a tiger, leopard and zebra.
How to make your very own animal Christmas tree topper.
For this arts and crafts activity you will need the following equipment: coloured paper or card, paintbrushes, googly eyes, glue, paint, pipe cleaners, safety scissors, large yoghurt pots, a plate, tape, pompoms and a pencil.
First, paint your yoghurt pot with the colour of your chosen animal.
Once you put his dried, use it to draw circles onto sheets of coloured card or paper and cut out using a pair of safety scissors. This will be the animals face.
Then add its facial features. You can use coloured card or paper, pens, googly eyes, pom pom nose or a pipe cleaner mouth.
For a tiger, we're using black paint to form stripes.
Then glue your animal's face to its body. and add to pipe cleaner to the base. You can even use a pipe cleaner to create a pair of ears. And once your animal is ready, you can display it on the top of your Christmas tree.
You can follow the same steps for any animal of your choice.We made a tiger, leopard and zebra… and there you have it, your very own animal Christmas tree toppers. We hope you have fun and have a very Merry Christmas.
To make an animal Christmas tree topper, you'll need:
- Recycled yogurt tub
- Card
- Paint
- Paint brushes
- Paint palette or plate
- Pipe cleaners
- Pom poms
- Googly eyes
- Black marker pen
- Pencil
- Safety scissors
- PVA glue/glue stick/tape
Let’s get started
1. Paint your yogurt pot the colour of your child's chosen animal (you may need multiple coats)
2. Draw a circle on coloured card for the animal’s face
3. Cut out your circle using safety scissors
4. Add the animal’s facial features (eyes, eyebrows, nose, mouth, ears) using pen, pom poms, pipe cleaners, and googly eyes
5. Once the paint has dried, decorate your animal’s body, perhap with stripes or spots
6. Glue your animal's face to its body
7. Tape a pipe cleaner to the base of your animal’s body
8. Put your tree topper on the top of your Christmas tree
Remember to have fun making them and enjoy spending time together. Merry Christmas!
More from BBC Bitesize Parents' Toolkit…
Parents' Toolkit
Fun activities, real-life stories, wellbeing support and loads of helpful advice - we're here for you and your child.


Fun activities for smaller children
Four to five-year-olds can have fun and learn new skills with these videos. From Tiny Happy People.

Rob Biddulph's five tips to help you confidently draw with your kids
Rob Biddulph, author and official illustrator for World Book Day, has some great tips and tricks to share to help you draw with your kids.
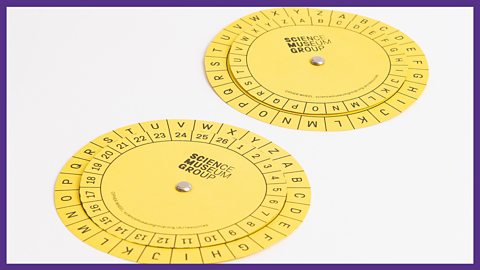
How to make a secret spy code wheel
Help your child make their own cipher wheel so they can create and learn their very own secret code!