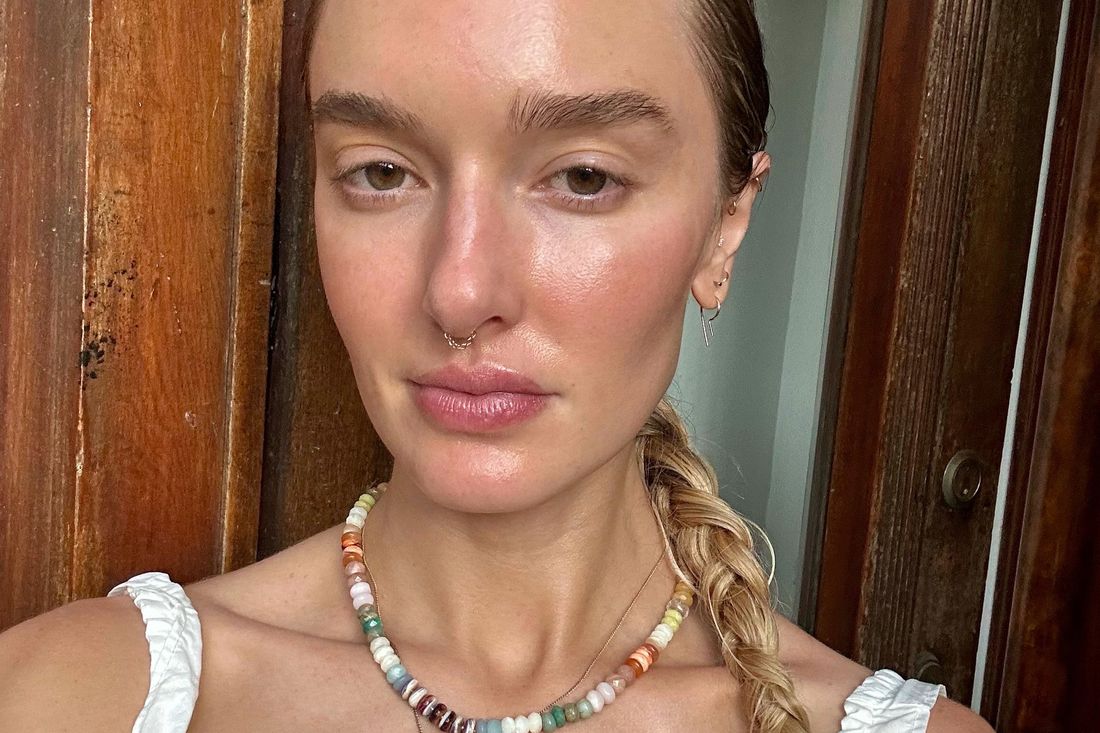
There are a handful of beauty treatments that are worthy of snapping a few in-process selfies: A luxury facial with a master esthetician, an impeccable blowout with a celebrity-favorite stylist, or a fierce gel manicure at your favorite neighborhood salon. But dermaplaning your face isn’t necessarily designed with your followers in mind. That’s not to say shaving your face isn’t worth it — on the contrary, I’ve become quite the dermaplaning devotee over the last few years. So while you’ll never see me post about my dermaplaning routine, just know that it’s my not-so-secret weapon to achieving flawless skin.
You know those thin, fine hairs that cover your face (as well as your torso, arms, and legs)? That peach fuzz — which is technically called vellus hairs — helps to regulate your body temperature and remove sweat throughout the day. It can be frustrating to see these patches of hairs either IRL or in photographs, especially if you’re trying to create a smooth, even complexion. That’s where dermaplaning steps in to help, wherein a single blade painlessly removes unwanted hair, all from the comfort of your bathroom.
“The action of dermaplaning takes away that vellus hair,” says Sofie Pavitt, an esthetician and the founder of Sofie Pavitt Face and Sofie Pavitt Studios in NYC. And while the hair that you might see on your head, pits, groin, and face is typically removed via shaving using a multi-blade razor, a dermaplaning tool uses only one blade to get as close to the skin as possible to pick up those ultra-fine hairs.
The Benefits of Dermaplaning
Aside from enjoying hair-free, sinfully smooth skin post-dermaplaning, there are some added benefits to incorporating this process into your monthly beauty routine. “Dermaplaning is really cool because it not only removes peach fuzz, but it also gives you a really beautiful blank canvas for makeup,” says Pavitt, who recommends taking time to dermaplane before a big event in particular. Your foundation and concealer will sit more evenly on hairless skin, and they’ll remain seamless for photographs well into the evening.
However, if you’re like me and you’re not a huge makeup wearer (and therefore unconcerned with how hypothetical foundation would look on your skin), Pavitt explains that dermaplaning is also an extremely effective exfoliation method since it removes dead cells on the surface of your skin. That means you’re not only left as bare as a baby’s bottom, but your complexion is also free of unwanted texture from pesky dry patches or healed acne marks. Cue all that luminosity that’s been hiding beneath your dry, dull skin for months.
Of course, if you already have an exfoliation routine, it’s important to not go overboard by adding dermaplaning into the mix. Says Pavitt, “You have to be careful when dermaplaning because if you have a lot of active ingredients in your routine such as retinol or acids — like mandelic or glycolic — you are then increasing your exfoliation rate by dermaplaning. So I would lay off the actives for a few days before doing it.” For example, once I know I’m due for a dermaplaning session, I pare down my skin-care routine to just cleanser and moisturizer for three days minimum, just to ensure I don’t irritate my skin.
How to Dermaplane Like a Pro
Obviously, wielding a blade near your face requires plenty of care and technique — you don’t want to rush and accidentally cut your cheek. “There are two methods when it comes to dermaplaning,” Pavitt says. “You can either do it on bone dry, extremely clean skin, or you can use an oil to create a slick finish to the skin.” She adds that if you’re blemish-prone, stick with the dry skin method so you don’t exacerbate your reactive skin.
I’m a fan of the dry method as well, and follow Pavitt’s instructions to the letter. First, you want to cleanse your face — I’m a fan of her Clean Clean Cleanser — to remove any dirt or debris that could catch on the blade. Then gently pat your skin dry. This is when I’d ordinarily add in my trio of serums, but this process requires completely naked skin — no added skin-care products allowed — before going in with your dermaplane tool, like the Revlon Face Defuzzers.
Angle the blade at 45 degrees on the face and work in short sections. “Hold the skin really taut and dermaplane in a downward motion on the face,” Pavitt says. I like to start at the edge of my cheek, right beneath the ear, and slide the blade down toward my jaw. I shake off any skin and hair (working over the sink will save your bathroom from any major mess) and move over an inch going toward my nose. Once I cover my entire cheek, I do my chin, my upper lip, and my forehead, which isn’t nearly as fuzzy but tends to acquire more dry skin.
After I’m done, I rinse my face with cold water to minimize any potential irritation and pat my face dry. Then I apply a calming product, like the Maelove NIA 10 Calming Serum, a rich moisturizer, like Dieux Instant Angel, and always sunscreen — Elta MD UV Clear SPF 46 has been my go-to for years. Once I’m ready to dermaplane again — usually three to four weeks later — I always start with a brand new blade to minimize the risk for nicks or cuts. Sure, it may seem tedious to painstakingly shave your face each month, but trust me, the flawless canvas is worth every second. Just don’t ask me for a behind-the-scenes look at my dermaplaning routine.
This advertising content was produced in collaboration between Vox Creative and our sponsor, without involvement from Vox Media editorial staff.
