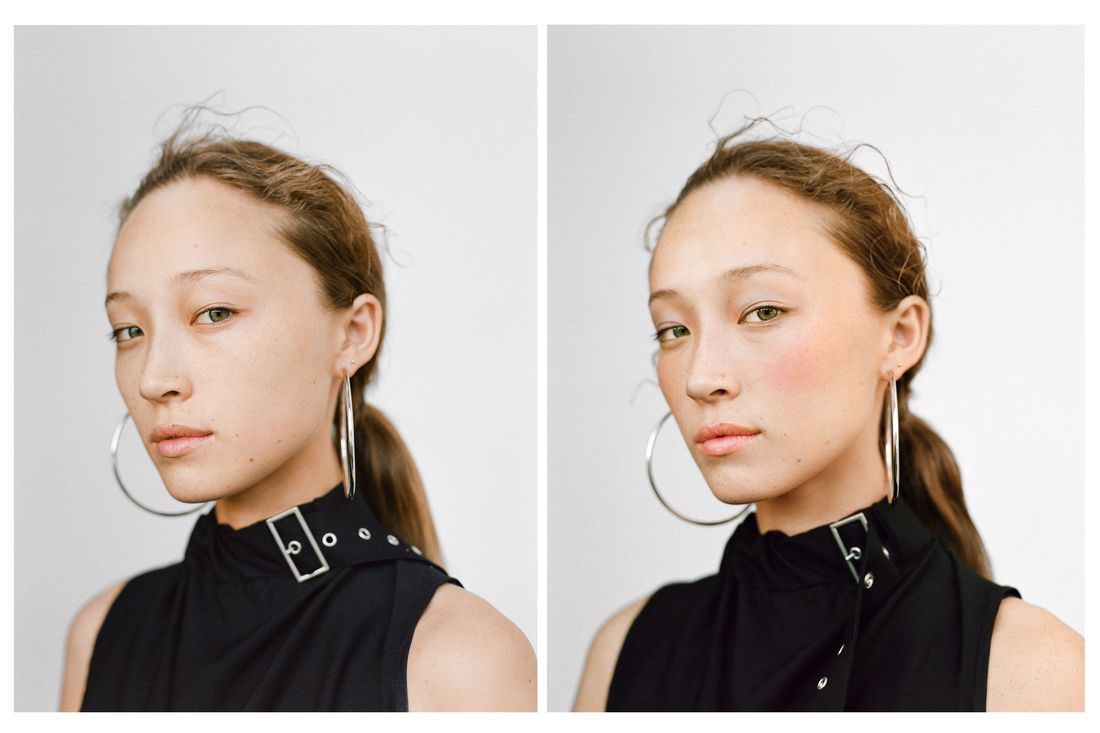
The way Harry bit his lip while looking at Meghan, a perfectly timed picture of Jeff Goldblum, and great makeup application — all things that might make your cheeks look appealingly flushed. The right blush makes you look healthy and awake, like you just finished a workout and are ready to take on the world. But blush can make some people nervous. Apply it to the wrong place, put on too much, or choose the wrong color, and you run the risk of looking more like a Victorian doll than like someone who just has really great circulation.
Celebrity makeup artist Nick Barose is here to help with that. In our next instance of Pretty Simple, our series on classic beauty techniques, Barose demonstrates how to apply blush. Here are his tips and tricks.
Watch the Video
Step One: Pick Your Color
We’re using powder blush in this tutorial, which means you’re going to need a fluffy blush brush. If you’re not quite sure which color to use, note that berry shades look great on all skin tones. Avoid anything anything that’s a cool pink tone or an exact color match for Barbie’s Dream House. On fair skin, Barose says a rose petal color is universally flattering. For darker skin, orange and corals can give a warm, romantic flush. In this case, he’s using NARS’ Narsissist Blush palette in Taos.
Step Two: Prime Your Cheeks
There’s an easy trick to ensure that you don’t give yourself blotchy drinking face while applying blush: Just lightly brush transparent powder all over your cheeks first.
Barose explains, “Powder blush gets blotchy because it absorbs oil. If you powder first, it absorbs oil so that won’t happen.”
Step Three: Dust Off Your Brush
Dip your brush on the palette and then tap it once or twice, onto a tissue or off the palette. Makeup artists never, never, never apply blush directly to the face without doing the tap. Ever.
“Why am I wasting this perfectly good Sephora-given pigment onto a tissue instead of my cheeks?” you’re probably wondering. Here’s why: Your blush brush needs to slow its roll. No matter how well-crafted it is, it will pick up too much pigment and give you puppet cheek. The best way is to make your blush look natural is to apply it in very light layers, gradually adding color — not all at once.
Step Three: Smile
Mother Theresa once said “Peace begins with a smile,” and so does accurate blush application. When you smile, your cheeks turn up. The middle of your cheek — that fleshy, bouncy area that upturns — is where you want to start your blush. You shouldn’t be anywhere near the sides of your nose, because you don’t want to give yourself the chapped skin of a frequent nose-blower. Sweep up from the middle of your cheek in a gentle half-C swoop up to just about your temple. Don’t end up at the sides of your eyes though, that means you’ve gone too far. Repeat steps two and three a few times to build color.
Step Four: Blend
This is the garnish step — the extra touch that makes your work look professional. Use a damp sponge (Barose likes Thrive Causemetics Blend and Blur Sponge) and blend the edges of the blush. This softens any harsh lines. If you feel like you’ve added too much color, you can also use the sponge to dampen some of the color.
The Finished Look
If you buy something through our links, New York may earn an affiliate commission.


